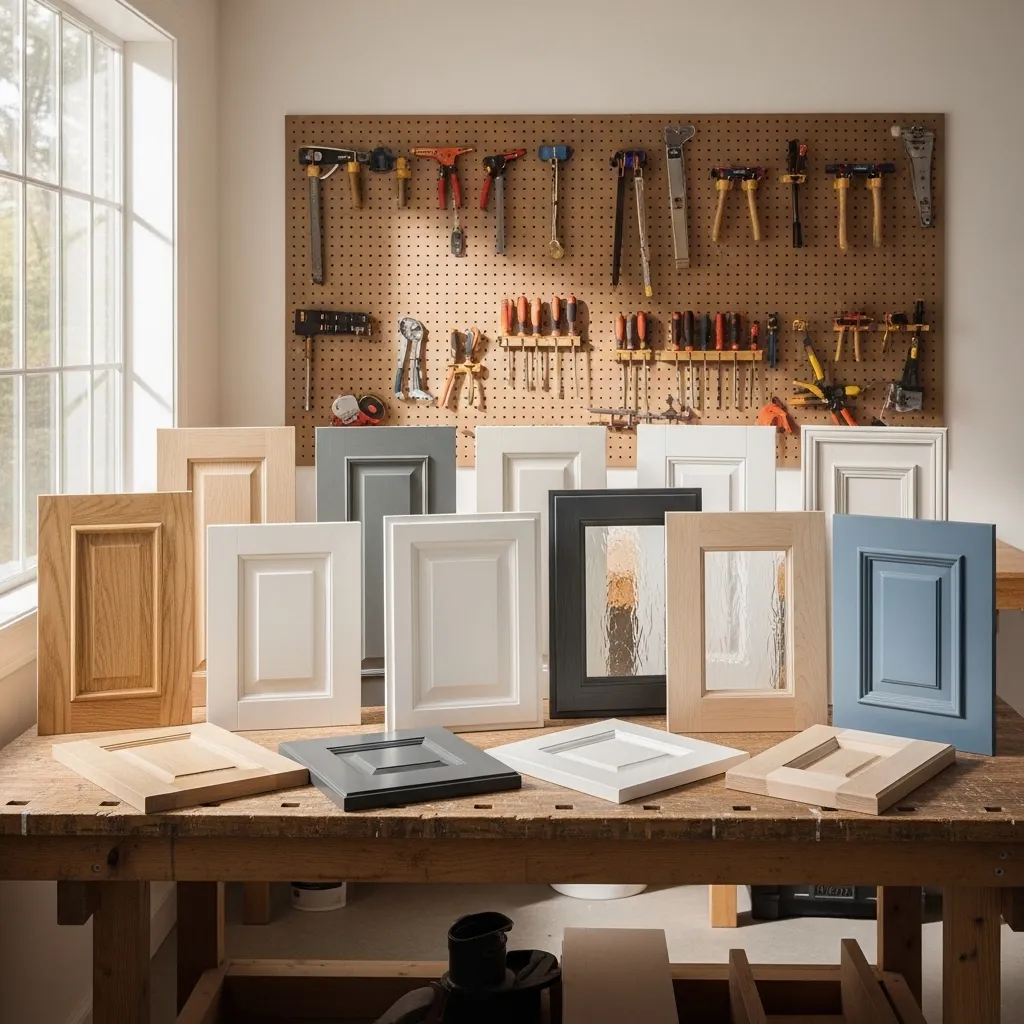
The 12 Easiest DIY Cabinet Doors to Build (No Fancy Tools Needed!)
Ever looked at your kitchen or bathroom cabinets and felt that itch to upgrade them? I’ve been there. Replacing cabinet doors is one of the most transformative DIY projects you can tackle, and you don’t need a professional workshop to do it. The secret is choosing a simple, beginner-friendly design.
I’ve built dozens of cabinet doors in my own home, learning what works with basic tools. This list is all about styles that are forgiving, stylish, and totally achievable. Whether you have a saw and a drill or just a steady hand, one of these ideas will be your perfect weekend project. Let’s build something beautiful!
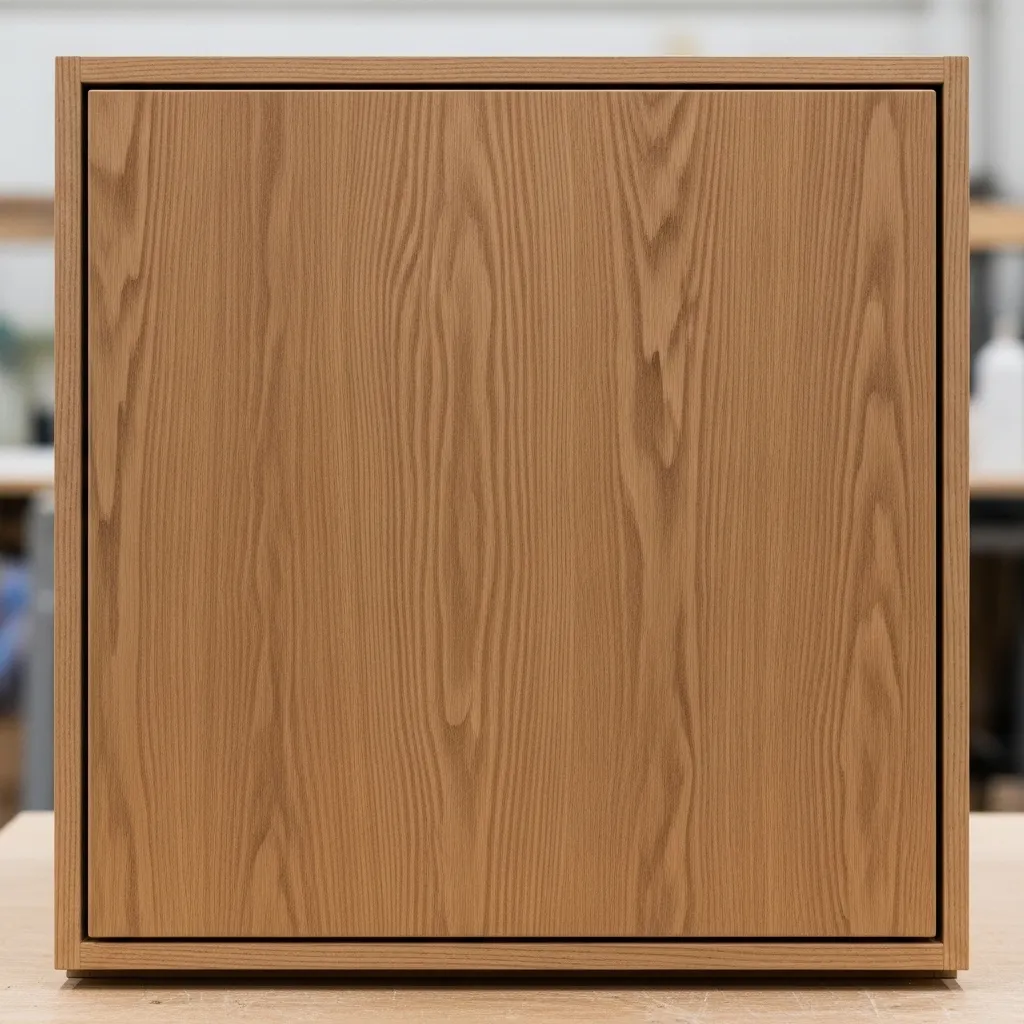
1. The Simple Slab Door
This is the ultimate starting point. A slab door is just a flat, smooth panel of wood or plywood. Its simplicity is its strength, offering a clean, modern look that works in any space.
All you need to do is cut your material to size, sand the edges smooth, and attach it with hinges. You can paint it a bold color, stain it for a natural wood look, or even cover it with peel-and-stick wallpaper for a quick pattern.
It’s foolproof. No joinery, no complicated cuts. Just measure twice, cut once, and you have a sleek new door.
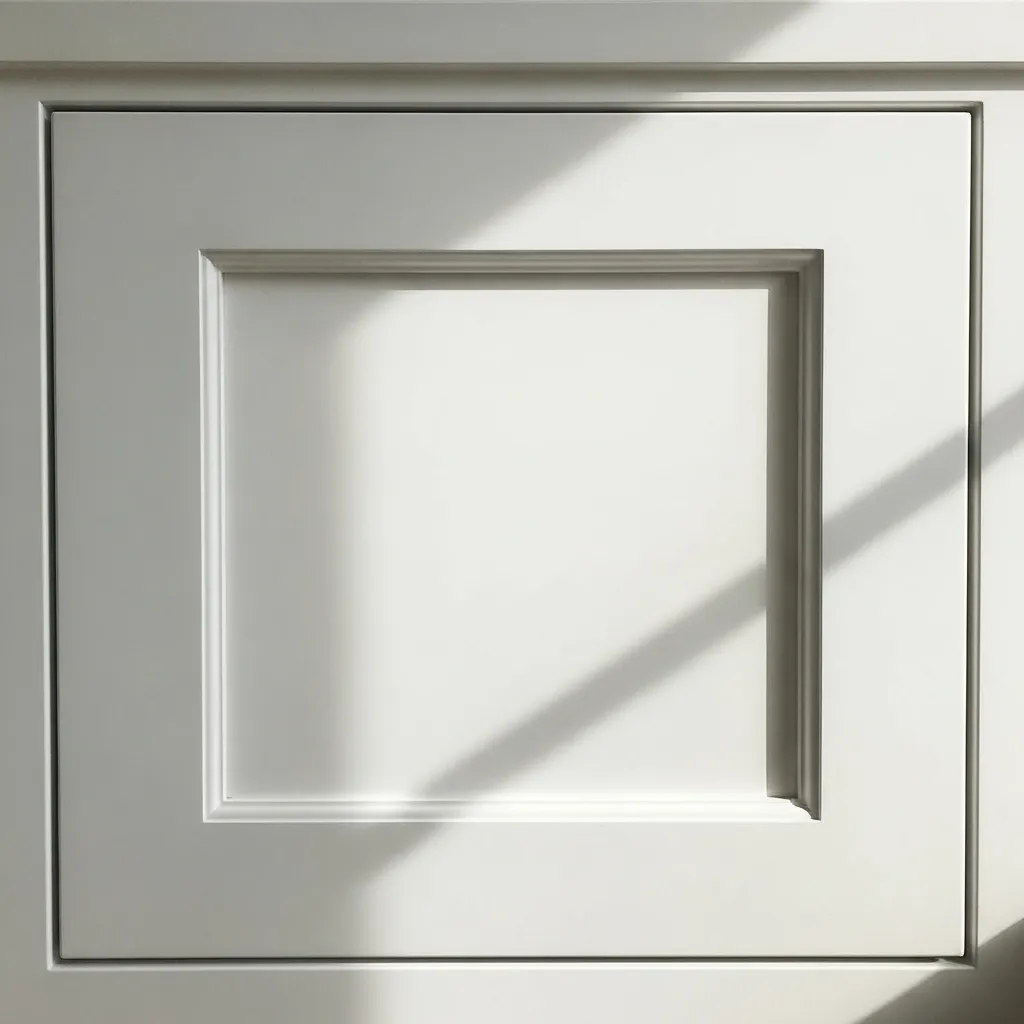
2. The Classic Shaker-Style Door
Don’t let the classic look intimidate you. A Shaker door is just a simple frame with a recessed center panel. It’s easier to build than it appears and adds instant timeless charm.
You create a square frame from four pieces of wood (rails and stiles) using basic butt joints or pocket holes. Then, you set a thinner piece of plywood into the groove on the back. It’s a project that teaches fundamental woodworking skills with a gorgeous result.
Paint it white for a farmhouse feel or use a dark stain for a more dramatic, modern twist.
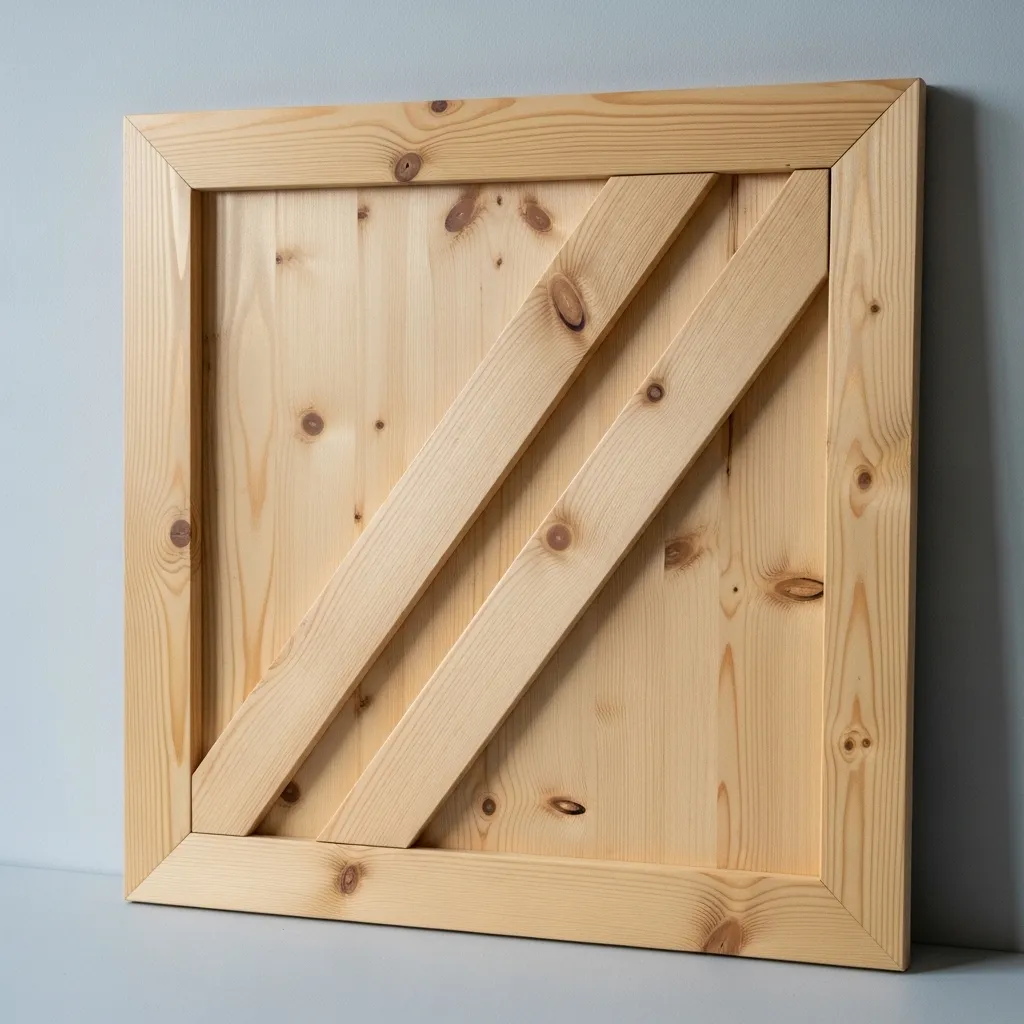
3. The Easy Z-Frame Door
Love the industrial look? The Z-frame door is your best friend. It’s essentially a slab door with a “Z” shaped frame attached to the front, made from simple 1×2 or 1×3 boards.
Build your flat slab base first. Then, cut your three frame pieces to form the “Z” shape, mitering the corners for a seamless look. Glue and nail them directly onto the slab. It adds so much texture and character with minimal effort.
This design is perfect for garage cabinets, home bars, or a loft-style kitchen.
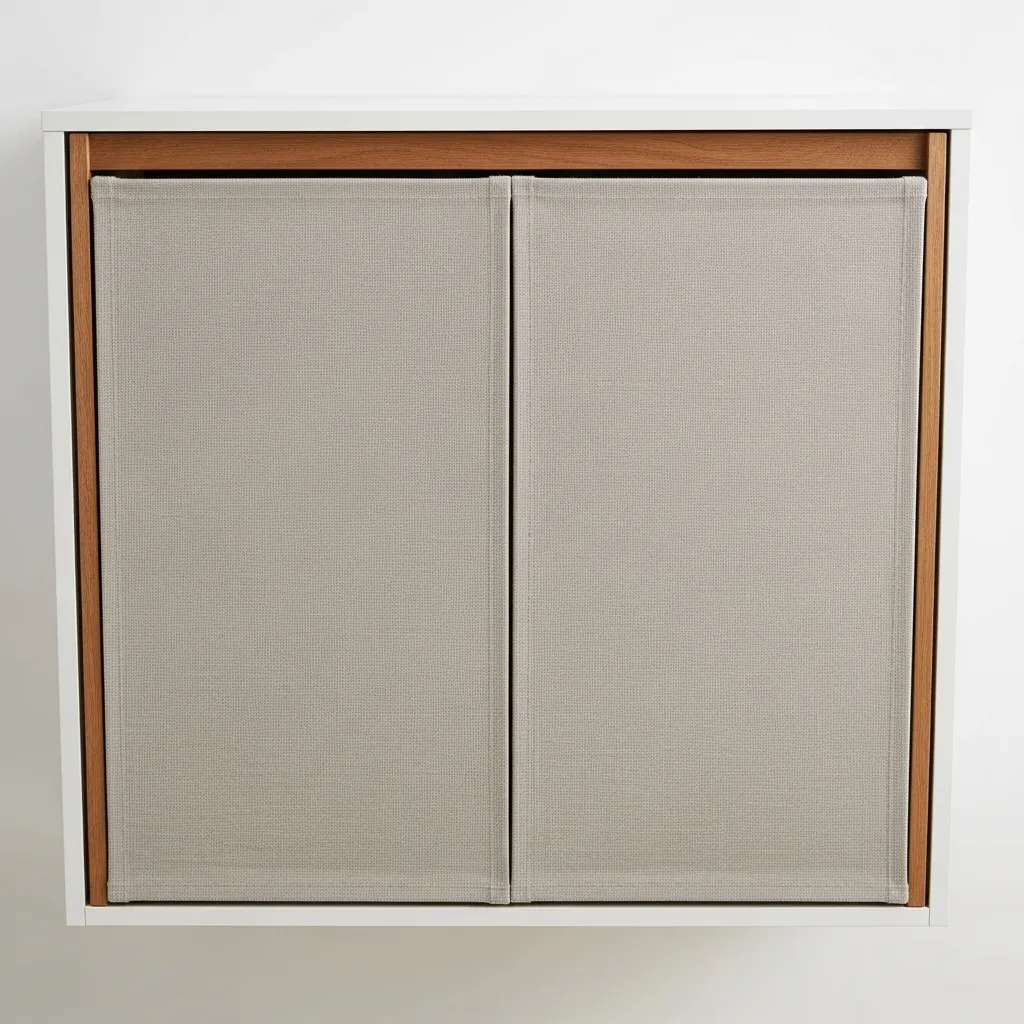
4. The Fabric-Covered Slab
This is a fantastic no-woodworking option for renters or anyone wanting a soft, textured look. You start with a basic flat slab door (or even a pre-made one).
Then, you simply stretch your favorite fabric over the front, stapling it tightly to the back. For a cleaner finish, you can add a thin layer of batting underneath first. It’s like reupholstering a piece of furniture!
Choose a durable, wipeable fabric for kitchens, or a beautiful linen for a bedroom armoire. It’s an instant pop of pattern.
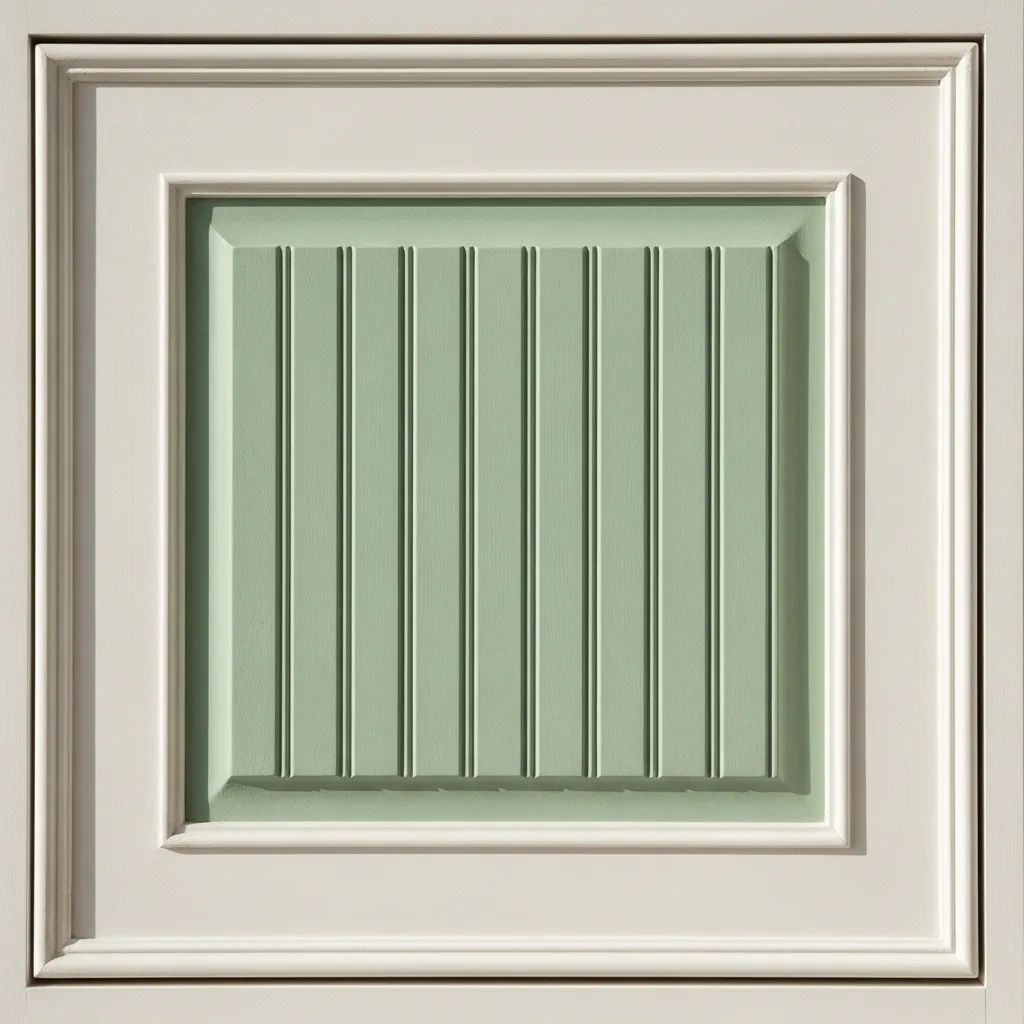
5. The Beadboard Beauty
Beadboard paneling isn’t just for walls. Using a pre-made beadboard plywood sheet is a shortcut to charming, cottage-style cabinet doors.
Cut the beadboard panel to size for your door. To finish it neatly, build a simple picture frame from trim pieces and attach it around the edges of the beadboard. This frames the texture and gives it a polished, built-in look.
It’s almost entirely assembly, not complex construction. A coat of pastel paint makes it absolutely dreamy.
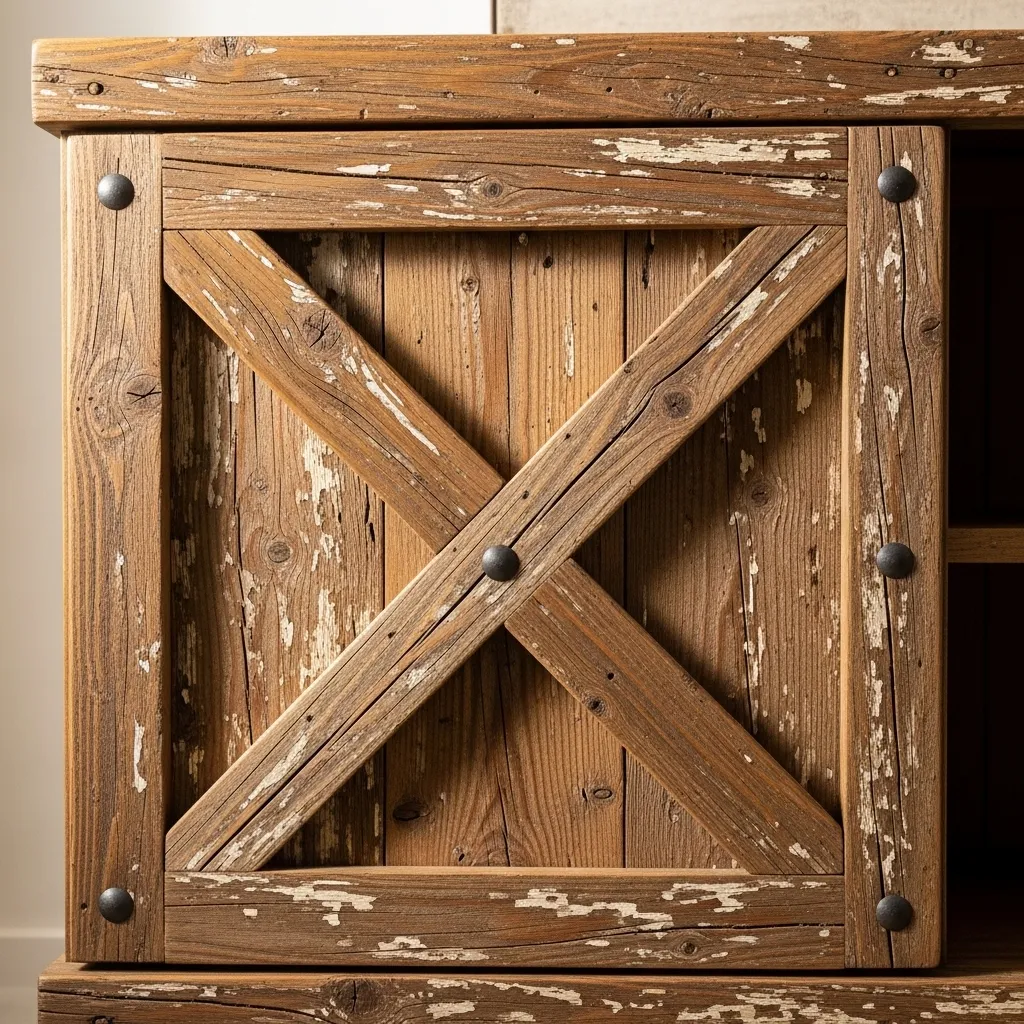
6. The Rustic X-Frame Door
Another winner for the farmhouse or rustic aesthetic. This design starts with a solid slab. The “X” is created with two crossed pieces of wood, often 1x3s, attached on top.
The trick is cutting the angles where the boards cross. A simple 45-degree miter cut on each end of both boards will create that perfect intersection. Secure them with glue and screws from the back.
It’s a bold, statement-making design that’s surprisingly straightforward to execute.
7. The Minimalist Finger-Pull Door
For the ultra-clean, handle-free look, try a door with an integrated finger pull. This modern design relies on a clever cut rather than added hardware.
You build a slab door, but instead of a rectangle, you cut a “J” or “U” shaped notch out of the bottom or side edge. This creates a lip you can easily hook your fingers into to open the cabinet.
It requires a steady cut with a jigsaw, but it eliminates the need to buy and install pulls, giving you that seamless, high-end appearance.

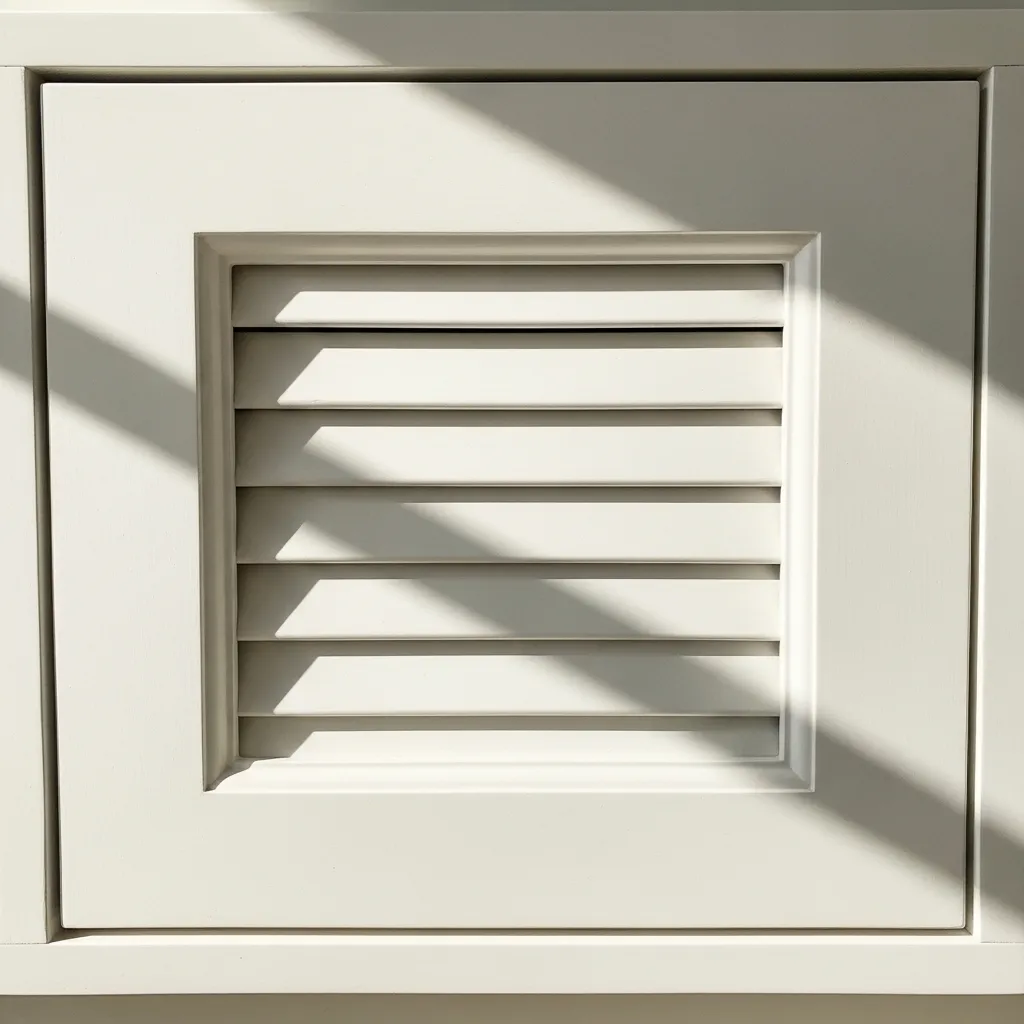
8. The Picture-Frame Louver
Want ventilation with style? A louvered door made from pre-cut lattice strips is easier than sourcing traditional louvers. Build a simple square frame first, just like the start of a Shaker door.
Then, instead of a solid panel, you’ll horizontally space and attach thin lattice strips inside the frame. You can use a small piece of wood as a consistent spacer. It’s perfect for cabinets that need airflow, like those housing electronics or linens.
It’s a functional piece that looks professionally made.
9. The Reclaimed Wood Patchwork
Embrace the perfectly imperfect! This door is a collage of reclaimed wood scraps, pallet wood, or different species of trim pieces.
Attach your varied wood pieces directly onto a thin backing board (like hardboard) in a pattern you love. You can align them neatly or go for a more random, artistic arrangement. The gaps and different textures are part of the charm.
Finish with a clear sealant to protect it. Every door is a one-of-a-kind work of art.

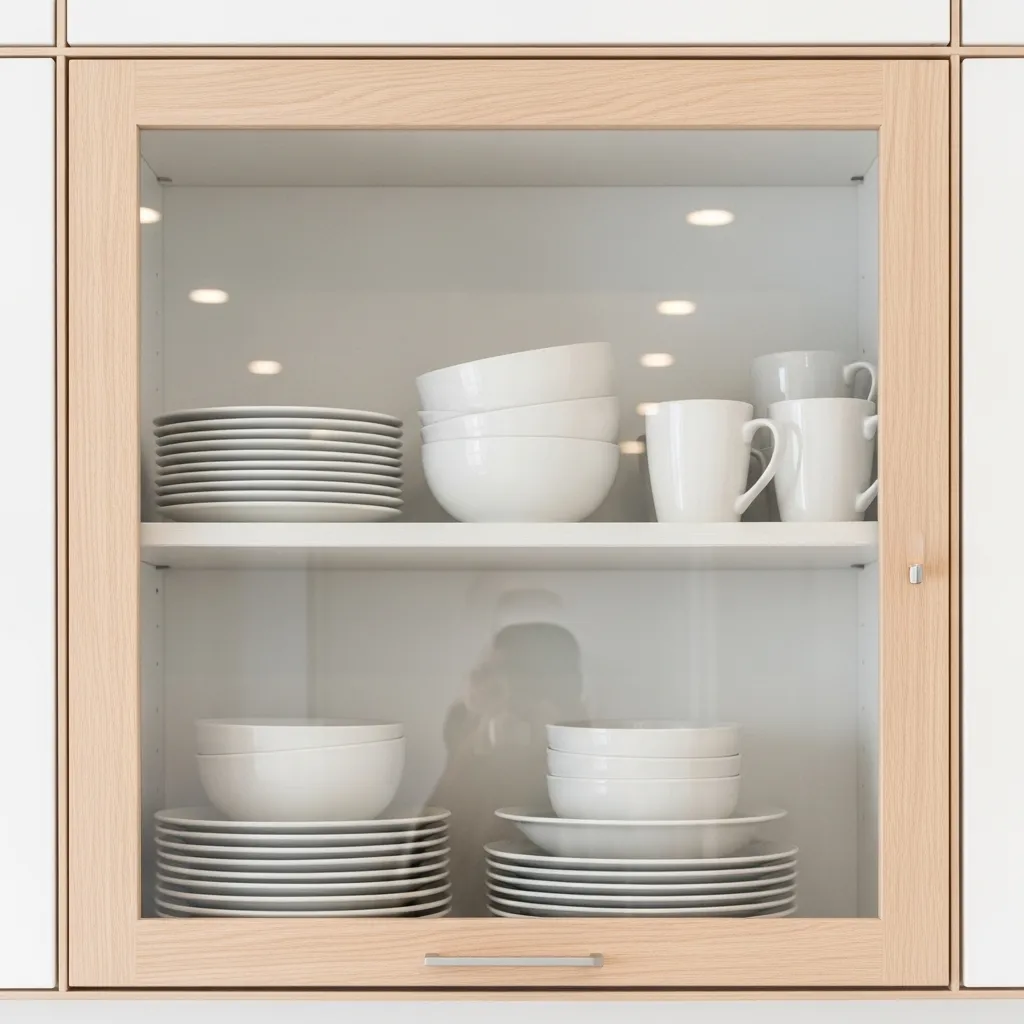
10. The Simple Glass-Front Door
Display your beautiful dishes or glassware. Converting a solid door to a glass front is simple. Build a standard frame door with a deep groove or rabbet cut on the inside edge.
Cut a piece of plexiglass (safer and easier than real glass) to fit the opening. Secure it in the groove with some small trim pieces or glazing points from the back. That’s it!
You get that custom look without the complexity of a traditional glass panel door.
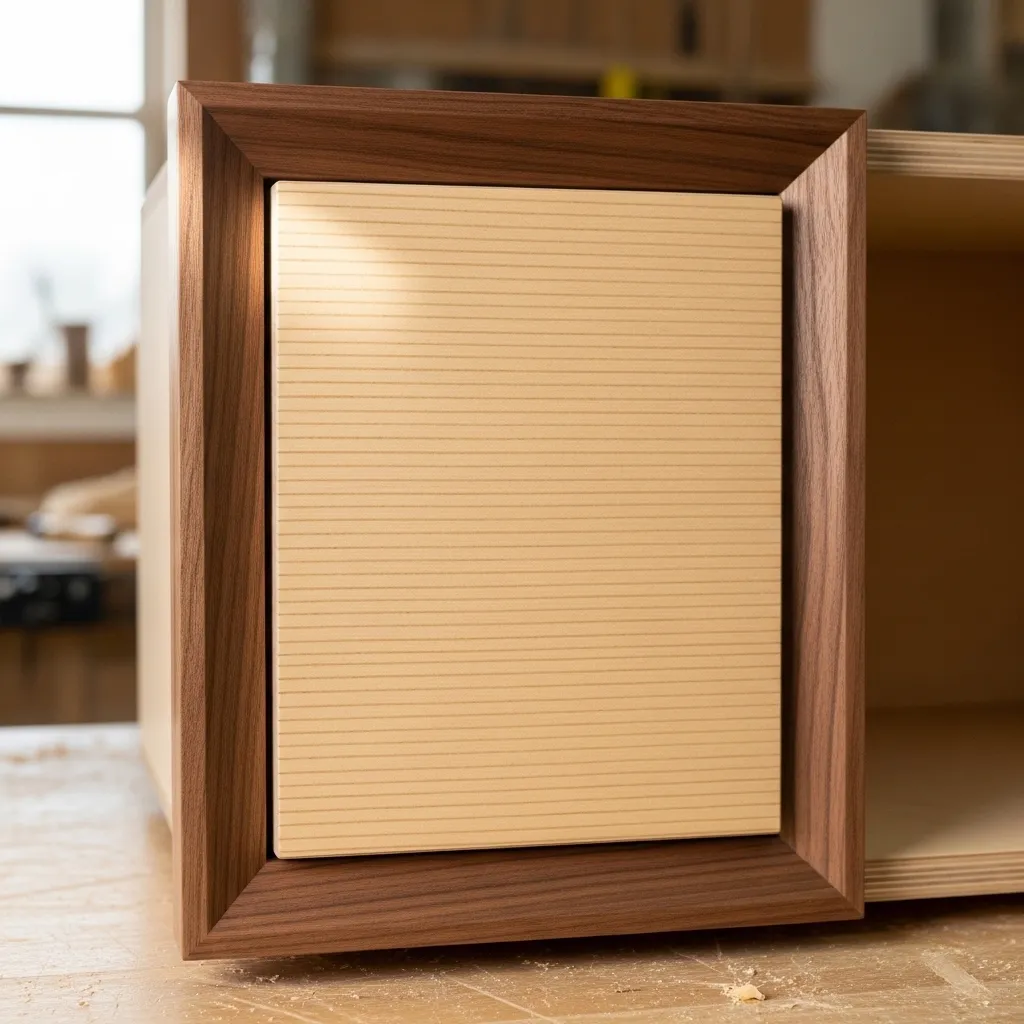
11. The Plywood Edge-Band Door
This is a genius way to make basic plywood look like expensive, solid wood. When you cut plywood, the layered edges show. The fix? Edge banding.
Cut your slab door from a nice plywood (like birch or oak). Then, apply iron-on wood veneer edge banding to all four sides. You just iron it on like a sticker, then trim the excess. It creates a flawless, solid-looking edge ready for stain.
It’s an inexpensive technique with a high-end payoff.
12. The Painted & Stenciled Slab
Sometimes, the decoration is the design. Take a plain slab door and turn it into a canvas. Paint it a solid base color and let it dry completely.
Then, use a large, reusable stencil to add a pattern—think geometric shapes, Moroccan tiles, or subtle florals. Use a small roller or stencil brush for a crisp pattern. It’s a zero-woodwork way to create a completely custom look.
This is my go-to for adding personality to a home office or craft room cabinet.

Ready to Start Your Project?
See? Building your own cabinet doors isn’t a mystery reserved for master carpenters. Each of these 12 ideas starts with a simple concept and uses basic techniques. The real magic is in the finish—the paint color, the stain, the hardware you choose. Pick one that matches your skill level and dive in. Your dream cabinets are just a weekend away. Don’t forget to share your before and after pictures!
DIY Cabinet Door FAQ
Q: What’s the absolute easiest door for a total beginner?
A: The Simple Slab Door (#1). It requires the fewest cuts and no joinery. If you can cut a straight line, you can make this door.
Q: What tools do I really need to get started?
A: A circular saw or a good handsaw, a drill, a sander, a tape measure, and clamps will handle almost every project on this list. A Kreg Jig for pocket holes is a hugely helpful upgrade.
Q: Can I use plywood for these doors?
A: Absolutely! Plywood is stable, affordable, and perfect for slab doors or as a base for other designs. Just remember to finish the edges with edge banding (#11) or paint.
Q: How do I make sure my doors are square?
A: Always measure diagonally from corner to corner after assembling. If the two diagonal measurements are equal, your door is square. Clamps are your best friend for holding pieces square while the glue dries.
Q: What’s the best type of hinge for DIY doors?
A: For inset doors (doors that sit inside the cabinet frame), use European concealed hinges. For overlay doors (doors that sit over the frame), simple butt hinges or semi-concealed hinges work great and are easy to install.